E2. Measurement
Compare, estimate and determine measurements in various contexts.
Learning Situation 1: Paper Wing
Total duration: approximately 1 hr 45 min
Summary
In this activity, students compare and measure the surface area of kites in different ways using geometric shapes.
|
Overall Expectation |
Specific Expectations |
|
E2. Compare, estimate, and determine measurements in a variety of contexts. |
E2.5 Use various units of different sizes to measure the same attribute of a given item, and demonstrate that even though using different-sized units produces a different count, the size of the attribute remains the same. E2.7 Compare the areas of two-dimensional shapes by matching, covering, or decomposing and recomposing the shapes, and demonstrate that different shapes can have the same area. E2.8 Use appropriate non-standard units to measure area, and explain the effect that gaps and overlaps have on accuracy. |
Learning Goals
The purpose of this learning situation is to have students:
- choose appropriate non-standard units of measurement to measure the area of a surface;
- use the chosen unit of measurement properly.
|
Learning Context |
Prerequisite |
|
In the primary grades, students develop a sense of measurement by using authentic contexts, manipulatives and the importance of measurement in everyday life. Students will explore area, using non-standard units of measurement. They will need to know what a surface is (for example, a two-dimensional plane) and that the amount of space the surface takes up is area (the size of a two-dimensional surface or space). They will choose an appropriate unit (for example, face of a cube) to measure a selected area (for example, the area of their desk), determine the number of units needed to cover it, and communicate the result using correct terms. Only after students understand the conceptual meaning of area should they use standard units of measurement (square units). |
To be able to complete this learning situation, students must:
|
Mathematical Vocabulary
area, superimpose, standard object, surface with largest area, surface with smallest area, surfaces with equal or similar areas, order
Materials
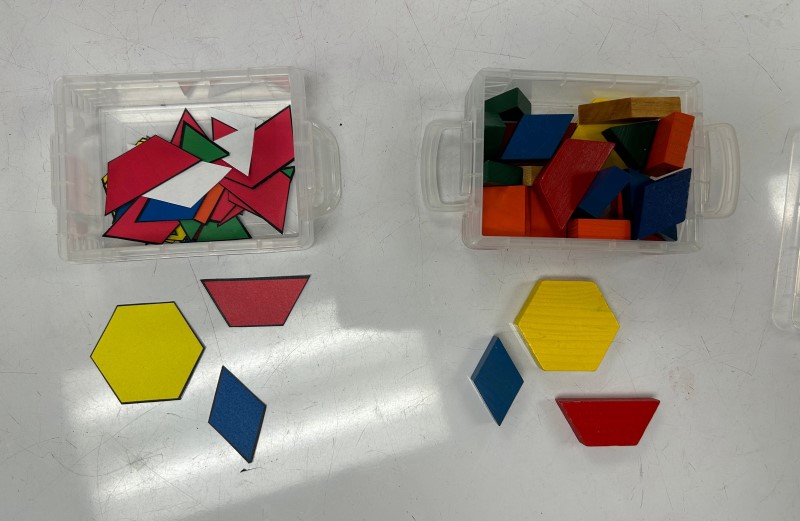
- pattern blocks in plastic or wood and paper
- pattern blocks on the interactive board
- glue sticks (two per team)
- Appendix 1.1 (one copy)
- Appendix 1.2 (one copy per student)
- Appendices 1.3, 1.4, 1.5, 1.6 (1 of each cut out for each group)
- Appendix 1.7 (one copy per student)
- ribbons
- wooden rods
- string
- illustration of quilts
- coloured paper (red, blue, yellow, orange, beige, green)
- interactive whiteboard
- large white cardboard or bristol board
Activation Phase
Duration: approximately 15 minutes
Form teams and give each team enough pattern blocks. Ask students to describe the different pattern blocks without emphasizing the correct terminology. Continue by asking them to cover the area of a trapezoid (red block) using other shapes from the pattern blocks. Emphasize to students that the pieces that cover the area should be side by side with no gaps or overlaps between the pieces. Compare solutions (for example, students can cover the area of the trapezoid with three green triangles, or with one blue parallelogram and one green triangle). Continue the exercise by covering the area of a blue parallelogram and then the area of a yellow hexagon with different pattern blocks.
This activity could be repeated later using other geometric shapes composed of two or more pattern blocks (for example, a hexagon and two trapezoids).
Before Learning (Warm-Up)
Duration: approximately 15 minutes
Read the letter to students from a grandmother named Mihn who has been living in Canada for a year (Appendix 1.1). As you read, introduce the illustration in Appendix 1.2.
Discuss the message in the letter by asking questions such as:
- What does Grandma Mihn ask us to do? (She asks us to find the number of pattern blocks needed to make a kite.)
- How will we determine the amount of pattern blocks needed to make the kite? (We could make a kite and cover it with pattern blocks.)
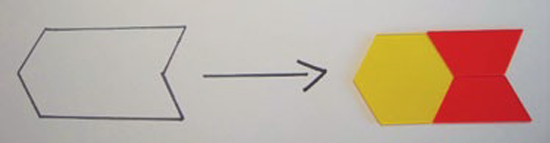
- What does the shape of the kite that Grandma Mihn sent us look like? (It looks like a parallelogram, one of the pattern blocks.)
- How will we find the solution to Grandma Mihn's question? (We will cover the kite with pattern blocks.)
- How are we going to get the solution to Grandma Mihn? (We'll write her an email and send her some pictures.)
Active Learning (Exploration)
Duration: approximately 60 minutes
As a first step, model covering the area of a shape using pattern blocks on the interactive whiteboard. Make connections to the activation activity.
Familiarize students with this activity by asking questions such as:
- How can we cover this surface?
- Can we leave spaces between the pattern blocks? Why?
- Can we superimpose pattern blocks? Why?
- Can we use all of the pattern blocks?
Make sure students understand that when covering a surface, there should be no overlap and space between the pattern blocks.
For the second step, form teams of 4 students each.
Give each team:
- four rhombuses of the same size as the one in Appendix 1.2 (kites) with stiff white cardboard;
- a sufficient quantity of plastic or wooden pattern blocks and a sufficient quantity of colored paper pattern blocks cut from Appendices 1.3, 1.4, 1.5 and 1.6;
- two sticks of glue;
- two copies of Appendix 1.7.
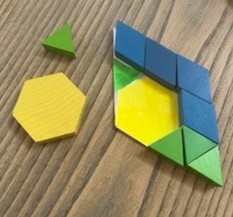
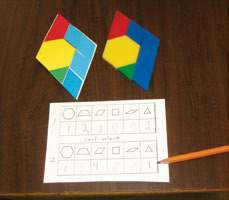
Ask students in each team to overlap the four kites so that they can see that the area of each kite is the same size. Then ask each student to cover two kites in two different ways using plastic or wooden pattern blocks.
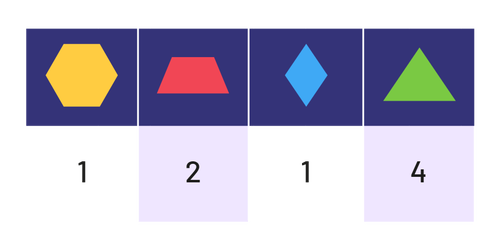
Present Appendix 1.7 to students and ask them to record the number of pattern blocks used to cover each kite in the tables. Then ask them to replace each plastic or wooden pattern blocks with a paper pattern block of equivalent shape and glue it in place.
Since this activity involves fine motor skills, some modifications can be made to make it easier for students, such as using self-adhesive pattern blocks available from various school supplies.
Circulate among students and ask questions such as:
- How are your kites different? (They are not covered with the same number or shape of pattern blocks.)
- Do the pattern blocks cover the entire area?
- Did you record the number of pattern blocks used for each shape in the counting table?
Consolidation of Learning
Duration: approximately 15 minutes
Gather the students together and invite them, in teams, to present their kites and tally boards.
Facilitate a discussion about the different ways to cover the same surface by asking the following questions:
- If you look at your four kites, which pattern block did your group use most often? least often? Why do you think this is the case?
- What information can be gathered from the tally tables? (They show the number of pattern blocks used to cover each kite.)
- When you covered the kites with pattern blocks, what did you measure? (We measured the area of the kites.)
- To measure the area of a kite, do all the pattern blocks have to touch each other? Why? (Yes, so that there is no uncovered surface on the kites or because the entire area of the kite must be measured.)
- Do all kites have the same size area? (Yes, when we put them on top of each other, they are the same size.)
- So how do you explain that the results entered in your tally tables are sometimes different, while the area of the kites is the same? (We used different pattern blocks.)
- How will you check that your tally table matches your kite? (The numbers in my table correspond to the pattern blocks glued to my kite.)
- What pattern blocks does Grandma Mihn need to make her fabric kite? (She will need four different shapes: triangles, trapezoids, rhombuses [the blue ones], and hexagons. She won't need squares or beige rhombuses, because we didn't have to use them to cover the kites.)
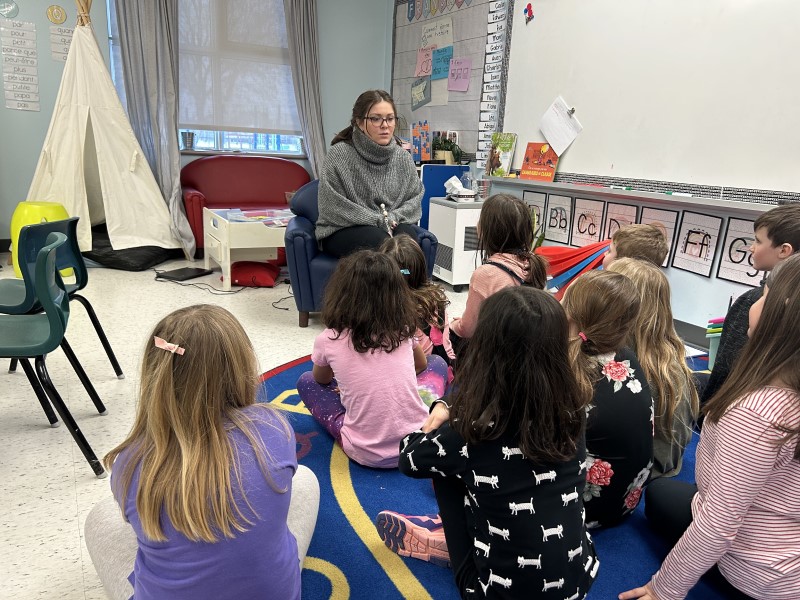
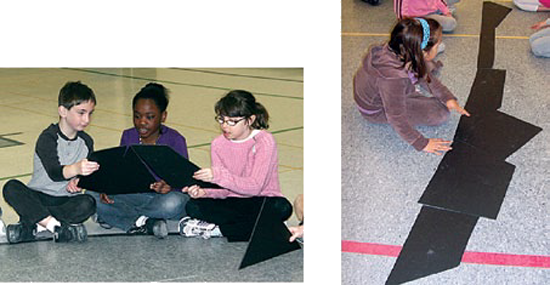
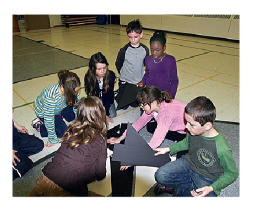
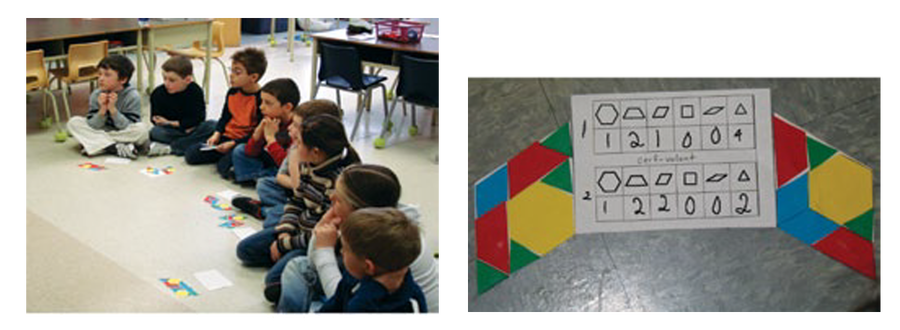 Image Students are sitting on the floor. In front of them there is a sheet of paper and
geometric shapes. Two kites on each side of a sheet that explain the shapes that have been used and their
quantities.
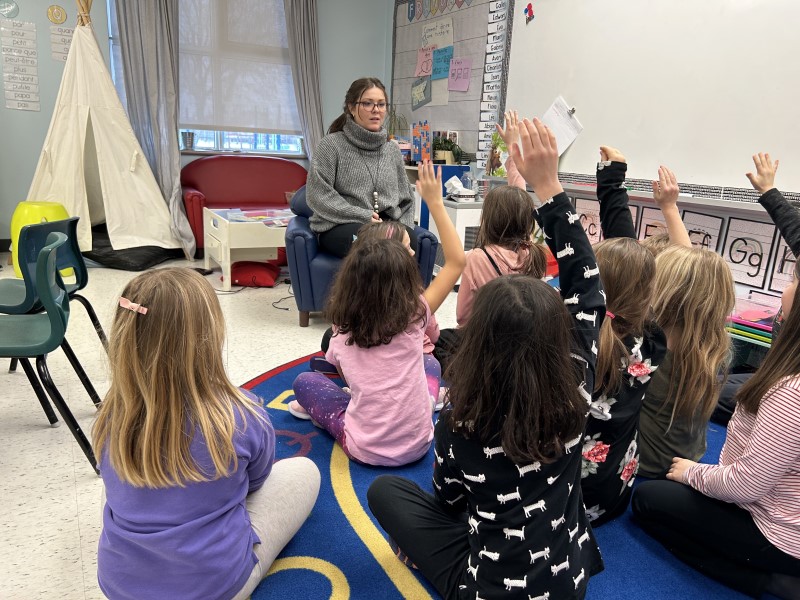
Image Students are sitting on the floor. In front of them there is a sheet of paper and
geometric shapes. Two kites on each side of a sheet that explain the shapes that have been used and their
quantities.
Have students observe, using the tally tables, that the number of pattern blocks varies with the size of the shapes used. The smaller the shape, the more pattern blocks it will take to cover the area of a kite. Students should understand that the area does not change, even though the number of pattern blocks covering it varies.
Extension
Assemble all the kites made by the students into a large collective kite by gluing the kites to a large piece of cardboard, framing the large collective kite with wooden rods to solidify it, and attaching a decorative ribbon.
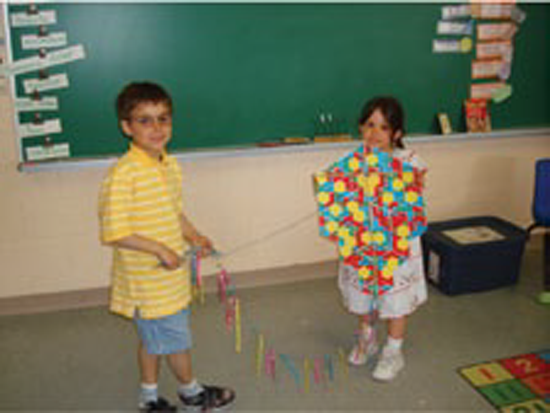 Image Class situation with two children. Child A is holding the string of the kite, there are ribbons
of different colors. Child B holds the kite that is filled with various geometrical shapes.
Image Class situation with two children. Child A is holding the string of the kite, there are ribbons
of different colors. Child B holds the kite that is filled with various geometrical shapes.
Facilitate a discussion by asking questions such as:
- How many small kites were used to make the large kite?
- How many pattern blocks did we use to cover the area of the large kite surface? (It would be possible to count the pattern blocks in all the tally tables.)
- Which pattern block is found in greater number on our large kite?
- Can you identify any patterns in the kite? Which ones?
- Looking at your big kite, what would you say to Grandma Mihn?
- What size fabric will Grandma Mihn need? (She will need a piece of fabric the size of our large kite.)
- How many of each shape will Grandma Mihn need?
Lead students to realize that the answer will depend on the shapes Grandma Mihn uses to make their large kite. Students could give answers like these:
- If Grandma Mihn uses only hexagons, they will need fewer hexagons, because the hexagon covers a larger area than the triangle or rhombus.
- If they use only triangles, they will need more, because the triangle covers a smaller area than the hexagon or rhombus.
- If they use only rhombuses, they will need more rhombuses than hexagons, but fewer rhombuses than triangles, because the rhombus covers a smaller area than the hexagon, but a larger area than the triangle.
Differentiated Instruction
|
To Facilitate the Task |
To Enrich the Task |
|
|
Follow-Up at Home
At home, students can:
- cover surfaces with different objects (paper or fabric squares);
- look for objects whose area is 5 or 10 times larger than the area of a previously chosen standard object.
Source: translated from Guide d’enseignement efficace des mathématiques, de la maternelle à la 3e année, Mesure, p. 122-129.
Learning Situation 2: Cakes Like No Other!
Total duration: approximately 2 hrs 30 min
Summary
In this learning situation, students develop their conceptual understanding of the attributes length and area. Following the construction of rectangles with the same perimeter but different area measurements, they assemble geometric shapes to construct a new shape with the largest possible perimeter. They then compare the area of the shapes from the various teams.
|
Overall Expectation |
Specific Expectations |
|
E2. Compare, estimate, and determine measurements in a variety of contexts. |
E2.1 Use appropriate units of length to estimate, measure, and compare the perimeters of polygons and curved shapes, and construct polygons with a given perimeter. E2.8 Use appropriate non-standard units to measure area, and explain the effect that gaps and overlaps have on accuracy. |
Learning Goals
The purpose of this learning situation is to have students:
- understand that rectangles that have the same perimeter do not necessarily have areas that are the same;
- recognize that the orientation of a shape does not change the perimeter or area of its surface.
|
Learning Context |
Prerequisite |
|
An important transition in learning about measurement in Grade 3 is the use of standard units of measurement from the International System of Units to determine the length and perimeter of the area of objects. In this learning situation, the teacher's goal is to have students understand what it means to determine the perimeter of an object and measure the area of a surface. The proposed activity is based on an authentic context and requires students to use the appropriate manipulatives and measuring tools. Focusing on the measurement of length (perimeter) and area attributes as well as the limitations of non-standard units, this activity facilitates a transition to standard units. |
To be able to complete this learning situation, students must:
|
Mathematical Vocabulary
area, surface, length, perimeter, contour, centimetre, square unit, unit, attribute
Materials
- string measuring 80 cm to 90 cm with tied ends (one per team)
- two sheets of graph paper (1 cm x 1 cm) glued together (one per team)
- markers (three different colors per team)
- loose sheets of paper
- sticky notes
- adhesive tape
- scissors
- sets of 12 large geometric shapes (one set per team)
- skipping ropes
- tangram (one per team)
- Appendix 3.1 (one per team)
- ruler (one per team)
Activation Phase
Duration: approximately 60 minutes
Provide each team with a piece of string, 80 cm to 90 cm long, with the ends tied.
Form teams. Initiate a discussion with students to assess their knowledge of perimeter and area.
Give each team a string, three different coloured markers, sheets of paper and a ruler to draw straight lines.
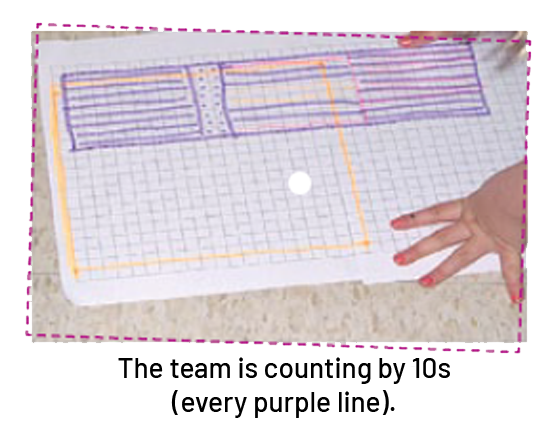
Ask students to use the entire string and without undoing the knot, make three different-sized rectangles on their graph paper. They should outline them in different colors, and record the perimeter and area measurements on Appendix 3.1 - Roadmap.
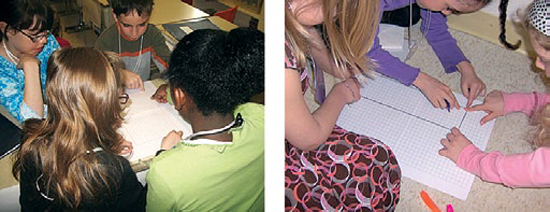 Image Two pictures of a classroom situation. The first one four students are measuring on a paper. The
second picture three students are measuring on gridded paperboard.
Image Two pictures of a classroom situation. The first one four students are measuring on a paper. The
second picture three students are measuring on gridded paperboard.
Circulate among the teams, observe their work and provide support, if necessary.
|
Possible Observations |
Possible Interventions |
|
A group does not use the entire string to create the rectangle. 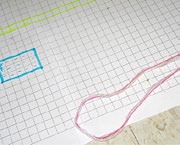
|
Remind students that they must draw the rectangle using the entire string. Ask students why this guideline is important (for example, you must use all the string to keep the same length of string for the outline of all the rectangles). |
|
One group struggles to determine the area of the surface because they find the number of squares too high. 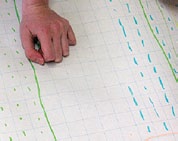
|
Ask students if they can determine the area of the surface without counting all the squares (for example, divide the rectangle into sections, count the square units of each section, then add the square units of all the sections). |
|
A group makes a quadrilateral, but forgets that a rectangle has right angles. 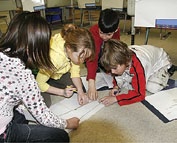
|
Ask students what they know about rectangles and explain whether their traced quadrilateral has these features. |
|
One group has difficulty determining the perimeter of the rectangles drawn. 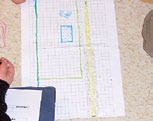
To find the perimeter, students count all the squares around the yellow rectangle. 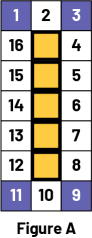 Image A figure " A ", is made up of 5 yellow squares, framed by blue and white squares. The
squares are numbered from one to 16, the corners are in the blue squares. Image A figure " A ", is made up of 5 yellow squares, framed by blue and white squares. The
squares are numbered from one to 16, the corners are in the blue squares.
|
Ask questions, such as:
Support them in understanding that none of the sides of the squares on the corners of the shape correspond to a side of the yellow rectangle defined by the string. Point out that even if the string touches several squares, it is not the square unit that must be counted, but the sides of the squares that touch the string. 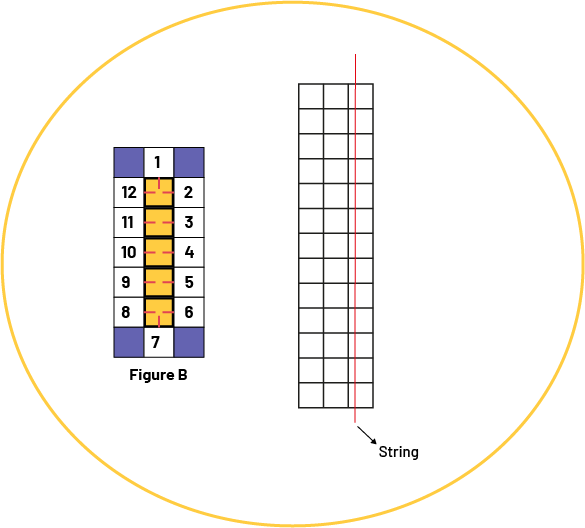 Image The first item " Figure B ", is composed of 5 yellow squares, framed by other
blue and white squares. These other squares are numbered from, one to 16, the angles are represented by
the blue squares. A grid is next to the figure "B", it is made of 3 columns of 13 squares. A red string
crosses the grid
lengthwise. Everything is circled in yellow.
Image The first item " Figure B ", is composed of 5 yellow squares, framed by other
blue and white squares. These other squares are numbered from, one to 16, the angles are represented by
the blue squares. A grid is next to the figure "B", it is made of 3 columns of 13 squares. A red string
crosses the grid
lengthwise. Everything is circled in yellow.
If necessary, untie the string and stretch it across a line on the grid sheet and count only the lengths of the squares. |
Prepare a table to compile the class results by having a member of each team record the results of their measurements on the chart.
Then ask some teams to explain how they drew their rectangles.
Present the completed table:
Example
|
Rectangle |
Perimeter |
Area |
Length of the Sides |
|
R1 Green Team |
86 cm |
156 square units |
(4 + 4 + 39 + 39 ) |
|
R2 Green Team |
86 cm |
330 square units |
(10 + 10 + 33 + 33 ) |
|
R3 Green Team |
86 cm |
460 square units |
(20 + 20 + 23 + 23 ) |
|
R1 Gold Team |
82 cm |
40 square units |
1 cm, 40 cm, 1 cm, 40 cm |
|
R2 Gold Team |
82 cm |
78 square units |
2 cm, 39 cm, 2 cm, 39 cm |
|
R3 Gold Team |
82 cm |
348 square units |
12 cm, 29 cm, 12 cm, 29 cm |
|
R1 Purple Team |
80 cm |
175 square units |
5 cm, 35 cm, 5 cm, 35 cm |
|
R2 Purple Team |
80 cm |
300 square units |
10 cm, 30 cm, 10 cm, 30 cm |
|
R3 Purple Team |
80 cm |
400 square units |
4 sides of 20 cm |
Legend: R1 represents rectangle 1, R2 rectangle 2 and R3 rectangle 3.
Use the results in the completed table to consolidate students' knowledge of the concepts of perimeter and area.
Ask questions such as:
- How did you determine the perimeter? (We determined the perimeter by counting the number of units of length on each side of the rectangle.)
- What do you notice about the perimeter of each team's rectangles? (All the rectangles on the same team have the same perimeter.)
- Why do you think you got these results? (We got these results because each team's string does not change length, it always produces the same perimeter.)
- What do you notice about the area of each team's rectangles? (The area of all the rectangles on the same team is different.)
- How did you determine the area of the surface?

- What do you notice about the length of the sides of each of the rectangles?
Possible examples of student responses include:
- Even though the sides of the three rectangles are different lengths, the sum of the side measures remains the same.
- Each rectangle has two pairs of sides of equal length.
- As the length of one pair of sides increases, the length of the other pair of sides decreases.
- What connections do you make between the length of the sides and the perimeter? (The sum of the lengths of the sides is equal to the perimeter.)
Note: The square is a rectangle since it has two pairs of sides of equal length.
Before Learning (Warm-Up)
Duration: approximately 10 minutes
Before the class begins, prepare pictures of fancy cakes cut out of magazines or found on the Internet. Post the pictures of the cakes on the board or wall before the students arrive in class. Ask the students a few questions to help them identify the different geometric shapes used to make the cakes.
Present students with the following situation:
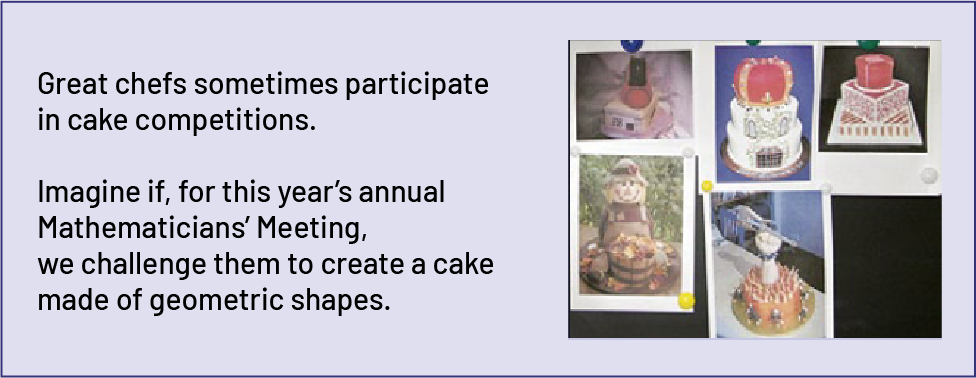 Image In a box, pictures of cakes are labeled: "Great chefs periodically compete in cake
competitions. Imagine that this year, for the Math Aces Society meeting, a challenge is issued to create a beautiful
cake made of geometric shapes."
Image In a box, pictures of cakes are labeled: "Great chefs periodically compete in cake
competitions. Imagine that this year, for the Math Aces Society meeting, a challenge is issued to create a beautiful
cake made of geometric shapes."
Active Learning (Exploration)
Duration: approximately 60 minutes
Ideally, this activity should take place in the gym.
Prepare several sets of 12 large geometric shapes.
Each set must contain the same shapes.
Large geometric shapes are cut from large pieces of Styrofoam (available at an office supply store) or are made of cardboard. The shapes can be quadrilaterals, triangles, or other polygons. All sides of the shapes must be straight. It is important that students can easily compare the shapes to determine the largest perimeter.
Have students sit in a circle and give each one a geometric shape from the large sets.
Invite students to place their shape in front of them so that it is clearly visible.
Ask students if they think their shape has the largest perimeter.
Invite other students to agree or disagree.
Some students will have the same geometric shapes since the sets are only composed of 12 shapes.
This activity provides an opportunity to point out the limitations of non-standard units (for example, lack of precision) and to suggest a reason to use standard units.
Form teams and ask them to determine which piece has the largest perimeter. It is very important that students verify and justify their choice by using a non-standard unit, such as a skipping rope. Have students present their results and describe their approach to comparing perimeters.
Collect the shapes to make the 12 starting sets.
Form different teams and give each team a set of 12 large geometric shapes that represent pieces of cake to assemble.
Explain to students the criteria to be met.
- The cake is made of 8 of the 12 geometric shapes distributed.
- The outline of the cake is a closed line.
- The sides of the shapes used must be lined up.
- The cake has the largest possible perimeter.
Circulate among the teams, observe the work and ask questions such as:
- Why did you choose these shapes? (We chose the eight shapes with the largest perimeter.)
- How will you check that your cake has the largest perimeter possible? (We'll try different layouts and measure them all or maybe we'll line up the shapes with the largest perimeters first and then add the others.)
- Is there any other way to arrange the shapes so that the perimeter of your cake is larger? (You should try to place only one side of each shape next to each other to get the largest perimeter.)
- To get a larger perimeter, could you replace one of the chosen shapes with one of the unchosen shapes? (Check that the unchosen shape has a larger perimeter than the shape it replaces.)
|
Possible Observations |
Possible Interventions |
|
The team does not choose the pieces with the largest perimeter. 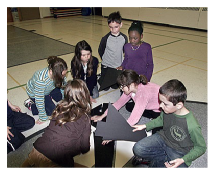
|
Teachers ask students to justify their choices and guide them in measuring the perimeters of each geometric shape using a string or other unit of measurement. |
|
The team assembles the pieces from vertex to vertex or vertex to edge and not by juxtaposing the sides of the shapes. 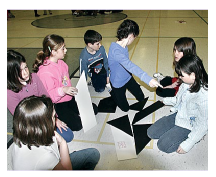
|
Teachers remind students that the outline of the cake should be a closed line. (A closed line is a line with two ends touching. Part of the side of one piece must match part of the side of another piece.) 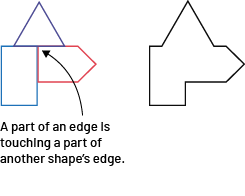
|
Consolidation of Learning
Duration: approximately 30 minutes
Ask each team to present their cake and explain their choice of geometric shapes and the process used to assemble the cake. Once the presentations are complete, ask the teams questions and encourage student discussion to consolidate students' knowledge of concepts.
|
Presentation by Team |
Questions to Ask |
The team presents a cake with pieces that have several adjacent sides. |
Initially, when you were asked to determine the shape with the largest perimeter, what were your observations about the dimensions of this piece? (The geometric shape with the largest perimeter was long and thin.) Does your cake have a similar shape? How can you modify your cake to get a larger perimeter? 
|
|
The team presents a long, thin cake. 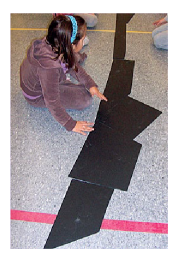
|
”Does your cake meet all the criteria?“ ”How did you determine the perimeter?“ ”Is it possible to modify your cake to get a larger perimeter?“ |
|
The team used a jump rope to determine the perimeter. 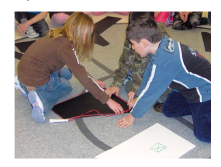
|
”How does the jump rope help you determine the perimeter of your cake?“ ”What could you use to get a more accurate measurement?“ (We could measure the shape created using standard units.) |
Initiate a discussion to help students understand how they can determine which cake has the largest perimeter. Have students realize that in order to compare the perimeters of cakes, they must use the same unit of measurement (for example, centimetres [cm]). Have students determine the perimeter of their cake in centimetres.
Compare the results of the presentations in a math conversation and determine which cake has the largest perimeter.
Extension - 1
Discuss with students another attribute of the cake that can be measured. Ask questions such as:
- What other attribute of your cake can be determined? (It is possible to determine the area of our cake.)
- What benchmarks can be used to determine the area of your cake? (You could use sticky notes.)
- What do you need to do to be able to compare the areas of the cakes' surfaces? (You can compare the pieces used or you can count the number of sticky notes used to cover the surface of the cake.)
- Will the areas of the cakes be the same or different? Justify your answer. (If the teams used the same pieces, the areas of the cakes will be equal. However, if the teams did not use the same pieces, the areas of the cakes will be different.)
Allow time for teams to determine the area of their cake and compare results in a math conversation.
Extension - 2
Give each student a set of tangrams and ask them to build a cake with the smallest or largest perimeter possible or with the smallest or largest area possible using all the pieces of the tangram.
Differentiated Instruction
|
To Facilitate the Task |
To Enrich the Task |
|
Distribute fewer large pieces and record the length of the sides in non-standard units on each (three lengths of pencils or straws). Hand out similar pieces (for example, rectangles). |
Assemble 12 pieces to build the cake with the smallest perimeter or the cake with the largest area. Assemble four pieces to build the cake with the largest area. |
Follow-Up at Home
At home, students can:
- determine which room has the smallest or largest perimeter.
- determine which window has the largest or smallest perimeter.
- determine the perimeter and area of a tablecloth using non-standard measurements (for example, with placemats).
- determine which object (for example, tablecloth, or bedspread) has the largest perimeter or has the largest area.
- find the area of rectangular cake pans using non-standard and standard units.
Draw representations on a sheet of graph paper, record the measurements in a table and order them in ascending order.
Source: translated from Guide d’enseignement efficace des mathématiques, de la maternelle à la 3e année, Mesure, p. 153-165.