E1.3 Draw top, front, and side views of objects, and match drawings with objects.
Activity 1: Draw Me a Picture #1
- Take a few identical straight rectangle-based prisms (for example, tissue boxes) and place them upright on some desks. Ask students to draw the front, side and top views of the prisms. Tell students that in order to see the front and side views, it is important that they position themselves so that their eyes are level with the surface of the desk. When the students have finished, ask one student to draw the different views of one of the prisms on the board. Share the results and ensure that all students agree with the views presented and understand how to obtain them.
Side view:

Front view:
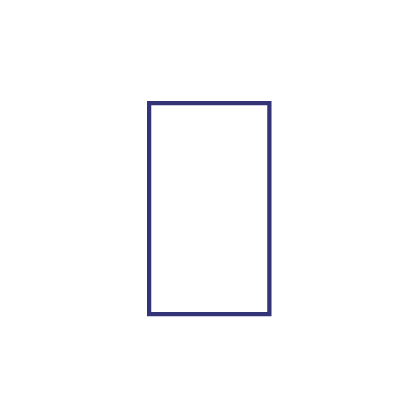
Top view:
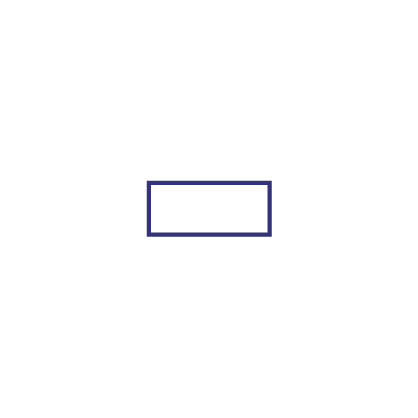
Note: Side and front views are interchangeable depending on the student's position relative to the object.
Source: translated from Guide d’enseignement efficace des mathématiques de la 4e à la 6e année, Géométrie et sens de l'espace, Fascicule 1, p. 104.
Activity 2: Three Views Are Better than Two!
Group students into pairs. Have them build a structure of some sort using a given number of interlocking cubes (for example, 15 cubes). Have them draw the front, side, and top views of this structure.
Retrieve all the view drawings and place all the structures in the same place (for example, on a table).
Give each team a drawing, making sure not to give them their own drawing.
Invite teams to find the structure corresponding to the front, side and top views of their sheet.
Note: Even with three views, it is possible to build two structures that are not perfectly identical.
Source: adapted and translated from Guide d’enseignement efficace des mathématiques, de la 4e à la 6e année, Géométrie et sens de l'espace, Fascicule 1, p. 92.
Activity 3: What Do We See from Above?
Ask students to draw all the top views that a structure made up of four interlocking cubes could have. Tell them that they should try to visualize all possible structures and draw the corresponding top views without using concrete materials. Group students in pairs and invite them to compare their answers. Allow them to use interlocking cubes to check their answers.
Note: The 11 top views below are possible.
 image 11 separate shapes composed of a series of squares. The first is a single square. The second is composed of two horizontal squares set side by side. The third is composed of three horizontal squares set side by side. The fourth one is composed of four horizontal squares set to sides. The fifth one is composed of four squares. The sixth is composed of a horizontal series of three squares, and a square under the second square. The seventh is composed of three squares forming a corner. The eighth is composed of four squares, including two horizontal lines of two squares each. The ninth is composed of four squares, with two horizontal lines of two squares each. The tenth is composed of a horizontal series of three squares, and a square under the first square. The eleventh is composed of a horizontal series of three squares, and a square under the third square.
Source: translated from Guide d’enseignement efficace des mathématiques de la 4e à la 6e année, Géométrie et sens de l'espace, Fascicule 1, p. 93.
Activity 4: Draw Me a Picture #2
Provide students with an illustration of a structure made from interlocking cubes. Ask them to draw the front, side and top views that might match the structure. Group students into pairs and have them compare their answers.
Note: The illustration shows the structure from only one angle. Since it could be made up of more cubes than shown in the illustration, the view drawings may vary.
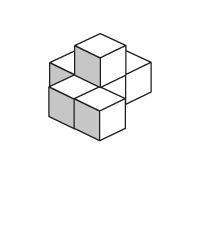
Example 1
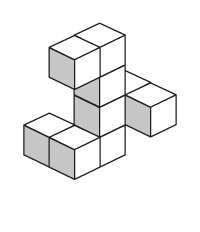
Example 2
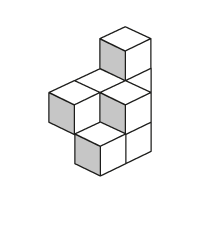
Example 3
Source: translated from Guide d’enseignement efficace des mathématiques de la 4e à la 6e année, Géométrie et sens de l'espace, Fascicule 1, p. 93.
